Sunday 4 December 2016

VMware VCSA 6 to VCSA 6.5 Upgrade Guide

VMware recently announced the GA - general available of vSphere 6.5 and I have been meaning to upgrade my homelab management cluster vCenter - VCSA 6 to 6.5 since then. Finally got the change request approval from my missus. :)

If you would like to read more on the GA announcement check out the link below.

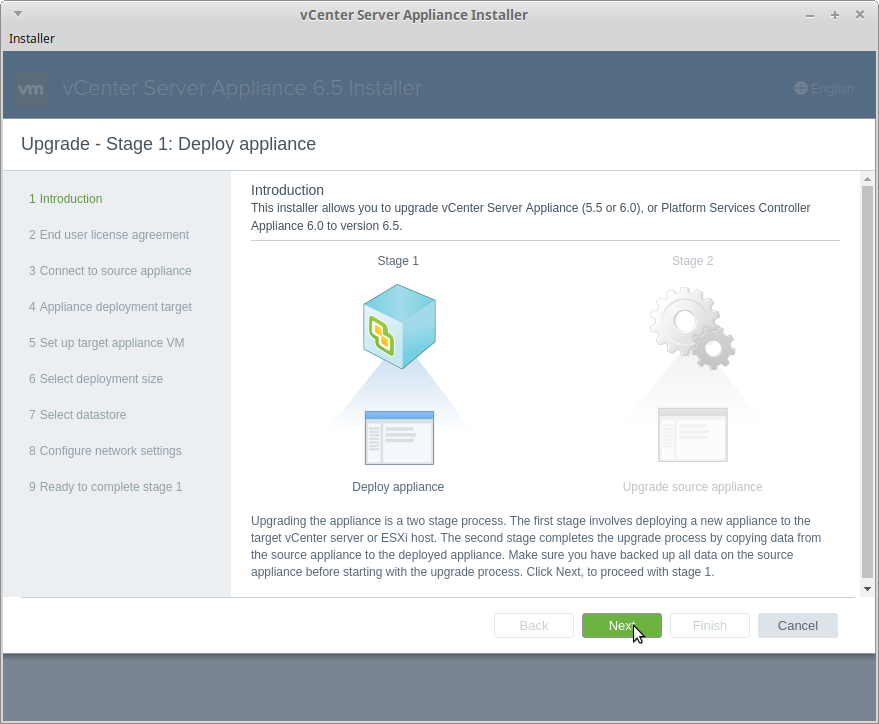
VMware has done a great job with VCSA installer and making it easier to install even from my Linux Mint laptop or Apple macOS if you have one. The process is similar to fresh install and it is pretty straight forward with two stages of installation. The first stage is to deploy new VCSA on the network with temporary IP address in the same subnet as the existing VCSA. The second stage copy the data from old VCSA to newly deployed VCSA 6.5.

Stage 1 of the deployment


    1. Download VCSA 6.5 ISO file from VMware from the link below. https://my.vmware.com/group/vmware/details?downloadGroup=VC650&productId=614&rPId=13348
      If you are deploying it in production or test/dev environment at your work, it is worth checking VMware Interoperability Matrix before any upgrade.

    1. Mount the ISO (I use Linux Mint on my laptop) and run the installer file from 'vcsa-ui-installer/lin64' folder or type "./installer" from the terminal.

lin64 
Help 
File Edit View Go Bookmarks 
Back 
Location: 'media/mOmO/CDROM,'Vcsa-ui-installer/lin64 
Name 
resources 
content_shell.pak 
icudtl.dat 
Installer 
libffmpegso 
libnodeso 
LICENSE 
o 
LICENSES chromium.... 
v Size 
54 items 
3 items 
9.9 MB 
10.1 MB 
67.6 MB 
2.6 MB 
21.1 MB 
1.1kB 
2.0kB 
Type 
folder 
folder 
PAK archive 
program 
executa ble 
shared library 
shared library 
Date Modified 
sat 05 Nov 2016 AEDT 
Tue 11 oct2016 AEDT 
Tue 11 oct2016 AEDT 
Tue 11 oct2016 AEDT 
Tue 11 oct2016 AEDT 
Tue 11 oct2016 AEDT 
plaintextdocument Tue 11 
HTML document Tue 11 oct2016 AEDT

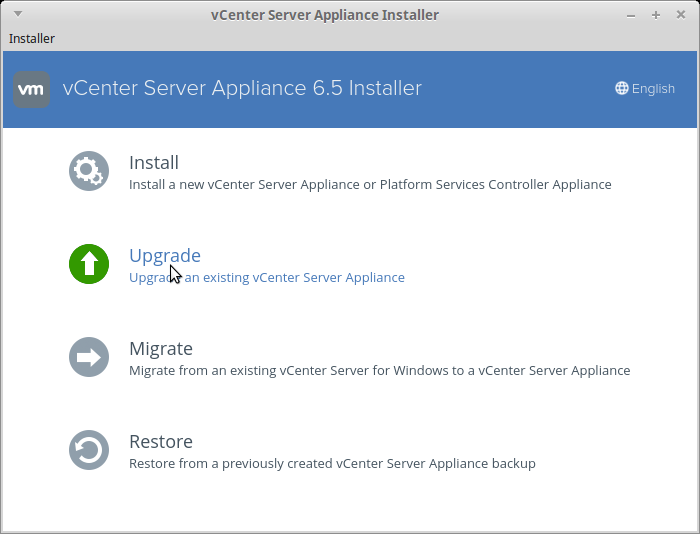
    1. Start the upgrade by clicking Upgrade button and follow the upgrade wizard.

vCenter Server Appliance Installer 
Installer 
vm vCenter Server Appliance 6.5 Installer 
Install 
@ English 
Install a new vCenter Server Appliance or Platform Services Controller Appliance 
Upgrade 
upgra an existing vCenter Server Appliance 
Migrate 
Migrate from an existing vCenter Server for Windows to a vCenter Server Appliance 
Restore 
Restore from a previously created vCenter Server Appliance backup


vCenter Server Appliance Installer 
Installer 
Upgrade - Stage 1: Deploy appliance 
Introduction 
1 Introduction 
This installer allows to upgrade vCenter Server Appliance (5.5 or 6.0), or Platform Sewices Controller 
2 End user license agreement 
3 Connect to source appliance 
4 Appliance deployment target 
5 Set up target appliance VM 
6 Select deployment size 
7 Select datastore 
8 Configure network settings 
9 Ready to complete stage 1 
Appliance 6.0 to version 6.5. 
Stage 1 
Deploy appliance 
upgrade source appliance 
upgrading the appliance is a stage process. The first stage involves deploying a new appliance to the 
target vCenter server or ESXi host. The second stage completes the upgrade process by copying data from 
the source appliance to the deployed appliance. Make sure you have backed up all data on the source 
appliance before starting with the upgrade process. Click Next, to proceed with stage 1. 
sack 
Nex• 
Cancel

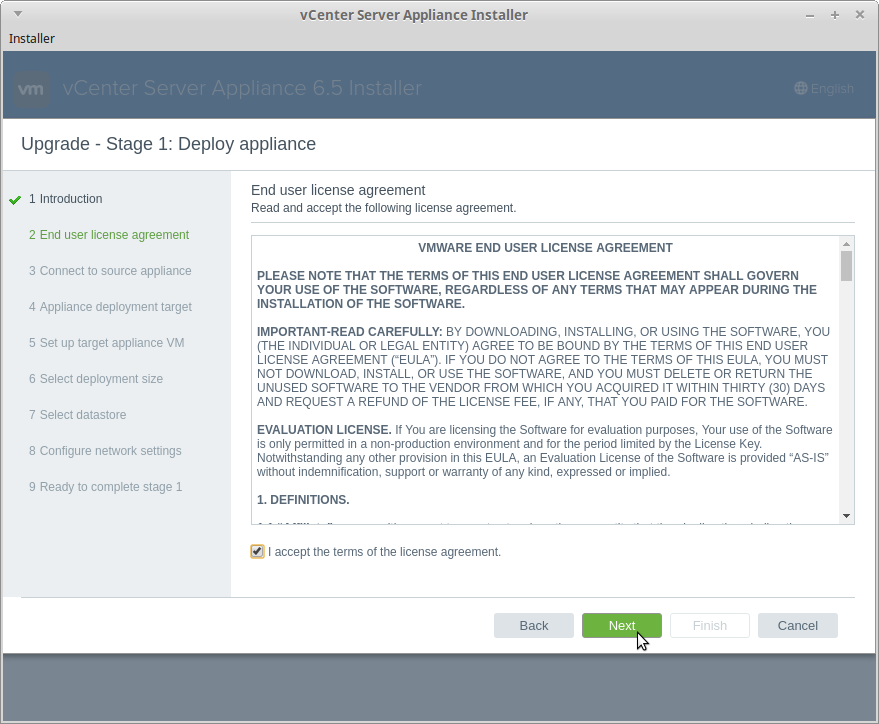
    1. Accept the license agreement and Next.
       
vCenter Server Appliance Installer 
Installer 
Upgrade - Stage 1: Deploy appliance 
1 Introduction 
2 End user license agreement 
3 Connect to source appliance 
4 Appliance deployment target 
5 Set up target appliance VM 
6 Select deployment size 
7 Select datastore 
8 Configure network settings 
9 Ready to complete stage 1 
End user license agreement 
Read and accept the following license agreement. 
VMWARE END USER LICENSE AGREEMENT 
PLEASE NOTE THAT THE TERMS OF THIS END USER LICENSE AGREEMENT SHALL GOVERN 
YOUR USE OF THE SOFTWARE, REGARDLESS OF ANY TERMS THAT MAY APPEAR DURING THE 
INSTALLATION OF THE SOFTWARE. 
IMPORTANT-READ CAREFULLY: ay DOWNLOADING. INSTALLING, OR USING THE SOFTWARE. YOU 
(THE INDIVIDUAL OR LEGAL ENTITY) AGREE TO BE BOUND BY THE TERMS OF THIS END USER 
LICENSE AGREEMENT CECJLA')_ IF YOU DO NOT AGREE TO THE TERMS OF THIS EULA. YOU MUST 
NOT DOWNLOAD. INSTALL, OR USE THE SOFTWARE, AND YOU MUST DELETE OR RETURN THE 
UNUSED SOFMARE TO THE VENDOR FROM WHICH YOU ACQUIRED IT WITHIN THIRTY (30) DAYS 
AND REQUEST A REFUND OF THE LICENSE FEE, IF ANY, THAT YOU PAID FOR THE SOFnVARE. 
EVALUATION LICENSE. If You are licensing the Software for evaluation purposes, Your use ot the Software 
is only permitted in a non-production environment and for the period limited by the License Key. 
Notwithstanding any other provision in this EULA. an Evaluation License of the Software is provided "AS-IS" 
without indemnification. support or warranty of any kind, expressed or implied. 
1. DEFINITIONS. 
I accept the terms of the license agreement. 
Next 
Cancel

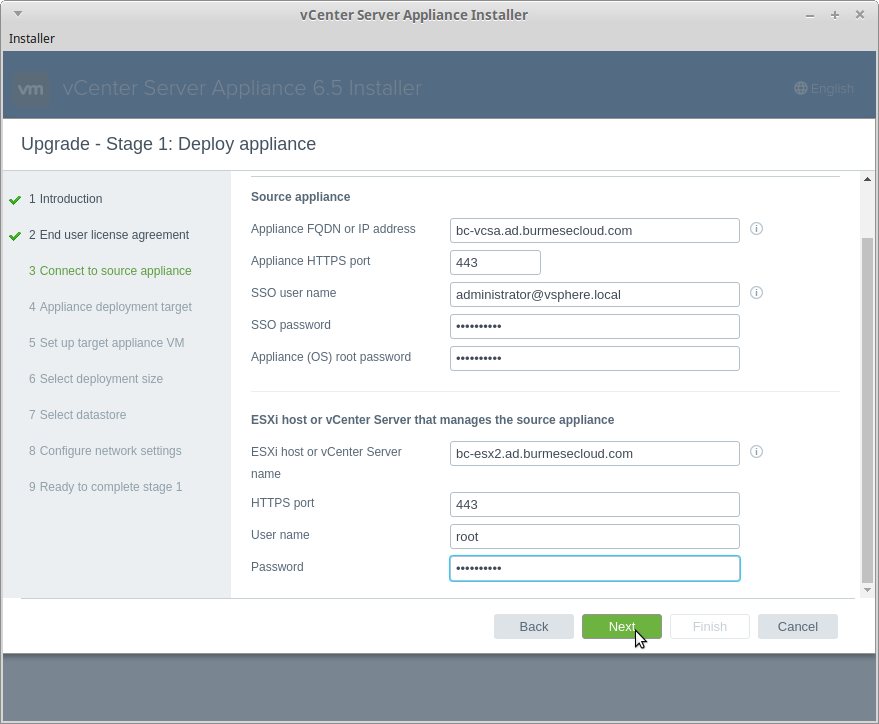
    1. Enter the FQDN/IP and account details of your existing VCSA and ESXi host.
       
vCenter Server Appliance Installer 
Installer 
Upgrade - Stage 1: Deploy appliance 
1 Introduction 
2 End user license agreement 
3 Connect to source appliance 
4 Appliance deployment target 
5 Set up target appliance VM 
6 Select deployment size 
7 Select datastore 
8 Configure network settings 
9 Ready to complete stage 1 
Source appliance 
Appliance FQDN or IP address 
Appliance HTTPS port 
SSO user name 
SSO password 
Appliance (OS) root password 
bc-vcsa.ad.burmesecloud.com 
administrator@vsphere.local 
ESXi host or vCenter Server that manages the source appliance 
ESXi host or vCenter Server 
HTTPS port 
user name 
Password 
bc-esx2.ad. burmesecloud com 
root 
Back 
Next 
O) 
O) 
O) 
Cancel

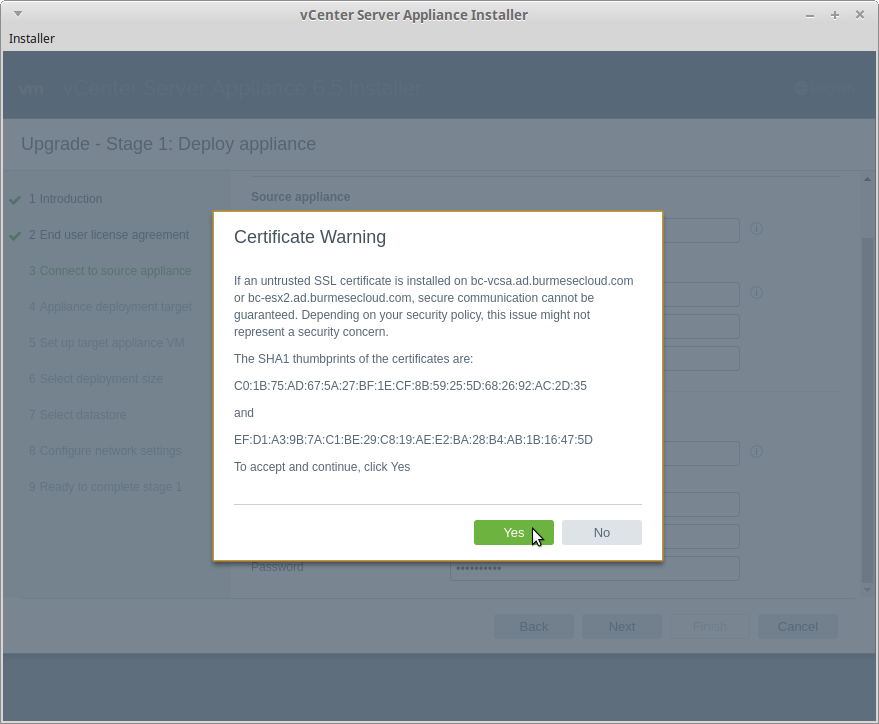
    1. Accept the security certificate warning if you trust it.

Installer 
Upgrade 
Stage 
vCenter Server Appliance Installer 
Deploy applianc 
Certificate Warning 
If an untrusted SSI_ certificate is installed on bc-vcsa.ad.burmesecloud.com 
or bc-esx2.ad.burmesecloud.com. secure communication cannot be 
guaranteed. Depending on your security policy, this issue might not 
represent a security concem. 
The SHAI thumbprints of the certificates are: 
To accept and continue, click Yes

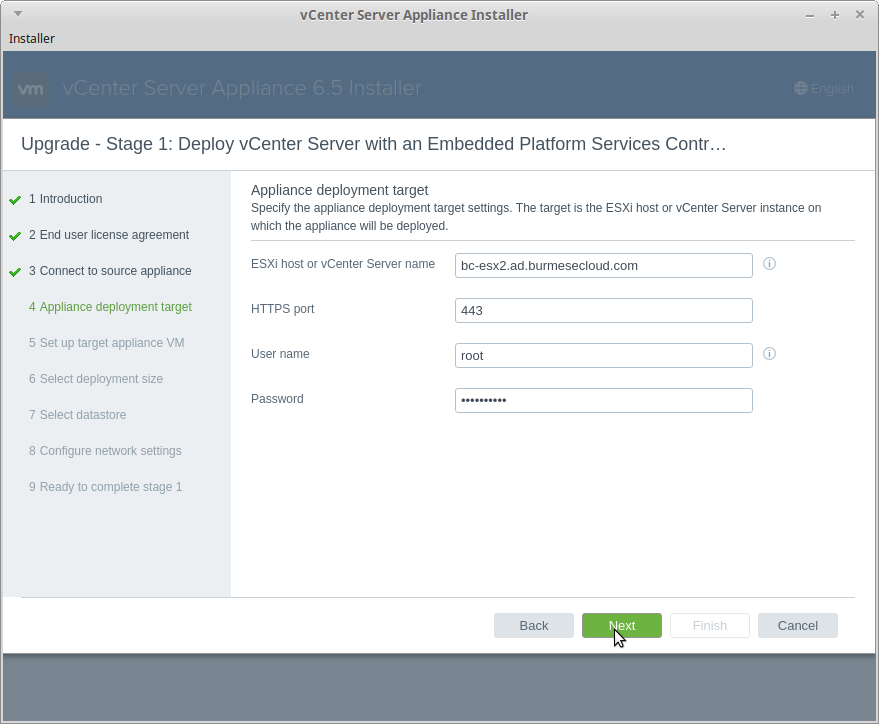
    1. Enter ESXi host details to run new VCSA on it.
Installer 
1 Introduction 
2 End user license agreement 
3 Connect to source appliance 
4 Appliance deployment target 
5 Set up target appliance VM 
6 Select deployment size 
7 Select datastore 
8 Configure network settings 
9 Ready to complete stage 1 
vCenter Server Appliance Installer 
Upgrade - Stage 1: Deploy vCenter Server with an Embedded Platform Services Contr. 
Appliance deployment target 
Specify the appliance deployment target settings. The target is the ESXi host or vCenter Server instance on 
v,nch the appliance will be deployed. 
ESXi host or vCenter Server name 
HTTPS port 
user name 
Password 
bc-esx2.ad. burmesecloud com 
root 
Next 
O) 
O) 
Cancel

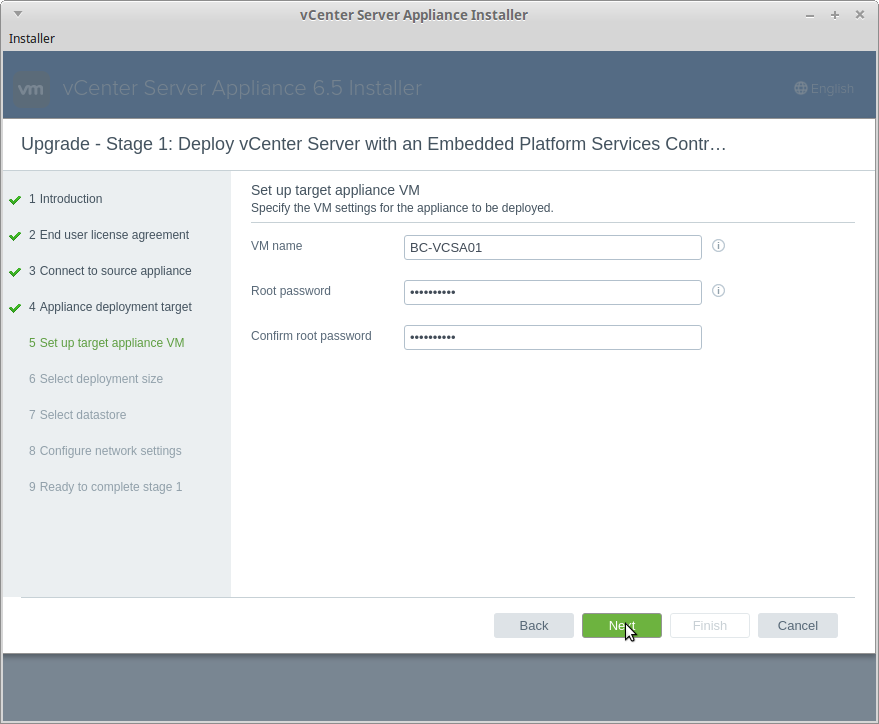
    1. Enter the VM name of new VCSA which must be unique from the existing one if hosting in the same cluster.

Installer 
1 Introduction 
vCenter Server Appliance Installer 
Upgrade - Stage 1: Deploy vCenter Server with an Embedded Platform Services Contr. 
Set up target appliance VM 
Specify the VM settings tor the appliance to be deployed. 
2 End user license agreement 
VM name 
3 Connect to source appliance 
Root password 
4 Appliance deployment target 
Confirm root password 
5 Set up target appliance VM 
6 Select deployment size 
7 Select datastore 
8 Configure network settings 
9 Ready to complete stage 1 
BC-VCSAOI 
O) 
O) 
Cancel


    1. Select the deployment size of VCSA that matches your requirement. I went with Tiny as I have less than 10 host and 100 VMs in my lab.

Installer 
1 Introduction 
2 End user license agreement 
3 Connect to source appliance 
4 Appliance deployment target 
5 Set up target appliance VM 
6 Select deployment size 
7 Select datastore 
8 Configure network settings 
9 Ready to complete stage 1 
vCenter Server Appliance Installer 
Upgrade - Stage 1: Deploy vCenter Server with an Embedded Platform Services Contr. 
Select deployment size 
Select the deployment size tor this vCenter Server vith an Embedded Platform Services Controller. 
For more information on deployment sizes, refer to the vSphere 6.5 documentation. 
Deployment size 
Storage size 
Small 
Medium 
Large 
Resources required tor di 
X-I_arge 
O) 
nt sizes 
Deployment Size vCPUs Memory (GB) Storage (GB) Hosts (up to) VMS (up to) 
Tiny 
Small 
Medium 
Large 
X-I_arge 
10000 
35000 
Cancel

    1. Pick the datastore for new VCSA. Tick "Enable Thin Disk Mode" if you have storage capacity constraint.

vCenter Server Appliance Installer 
Upgrade - Stage 1: Deploy vCenter Server with an Embedded Platform Services Controller 
Installer 
1 Introduction 
2 End user license agreement 
3 Connect to source appliance 
4 Appliance deployment target 
5 Set up target appliance VM 
6 Select deployment size 
7 Select datastore 
8 Configure network settings 
9 Ready to complete stage 1 
Select datastore 
Select the storage location tor this vCenter Server with an Embedded Platform Services Controller. 
Name 
xpeno-nfs-iso 
Local-DSL 
vsanDatastore 
xpeno-iscsi-luno 
Type 
NFS 
VMFS 
VMFS 
Y Capacity 
Free 
provisi.. 
Y Thin Provisioning 
1.59 -ra 
931.25 G8 
922.19 
499.75 
1.46 -ra 
887.24 G8 
741.39 
322.71 
Back 
130.91 
44.01 GB 
180.8 GB 
177.04 
true 
true 
true 
true 
4.1 Enable Thin Disk Mode @ 
4 items 
Cancel

    1. Select the network portgroup and assign temporary IP address to new VCSA. It is recommended to put in the same subnet as the existing VCSA.

Installer 
1 Introduction 
2 End user license agreement 
3 Connect to source appliance 
4 Appliance deployment target 
5 Set up target appliance VM 
6 Select deployment size 
7 Select datastore 
8 Configure network settings 
9 Ready to complete stage 1 
vCenter Server Appliance Installer 
Upgrade - Stage 1: Deploy vCenter Server with an Embedded Platform Se. 
Configure network settings 
The appliance requires a temporary network identity so that it can copy data from the source 
appliance. After the data has been copied. the network identity of the source appliance is 
also copied to the appliance, and then the source appliance is shut down. 
Network 
Temporary network settings 
IP version 
IP assignment 
Temporary IP address 
Subnet mask or prefix 
length 
Default gateway 
DNS servers 
Ipv4 
192.168.10.g 
255.255-255.0 
192.168-10.254 
192.168.10.1,192.168.10.254 
Next 
O) 
Cancel

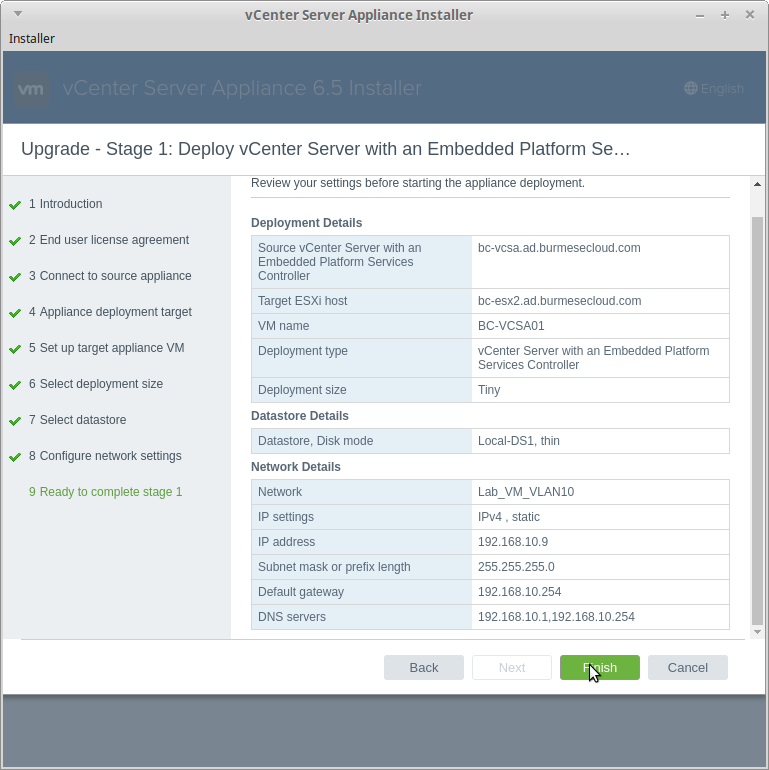
    1. Review the config summary and click Finish.

Installer 
1 Introduction 
2 End user license agreement 
3 Connect to source appliance 
4 Appliance deployment target 
5 Set up target appliance VM 
6 Select deployment size 
7 Select datastore 
8 Configure netvnrk settings 
9 Ready to complete stage 1 
vCenter Server Appliance Installer 
Upgrade - Stage 1: Deploy vCenter Server with an Embedded Platform Se. 
Review your settings before starting the appliance deployment. 
Deployment Details 
Source vCenter Server with an 
Embedded Platform Services 
Controller 
Target ESXi host 
VM name 
Deployment type 
Deployment size 
Datastore Details 
Datastore, Disk mode 
Network Details 
IP settings 
IP address 
Subnet mask or prefix length 
Default gateway 
DNS servers 
Back 
bc-vcsa.ad.burmesecloud.com 
bc-esx2.ad burmesecloud.com 
ac-VCSA01 
vCenter Server with an Embedded Platform 
Services Controller 
Tiny 
Local-DSI, thin 
Lab VM VLANIO 
IPv4 , static 
192.168.10.g 
255.255.2550 
192.168.10.254 
192.168.10.1,192.168.10.254 
Cancel

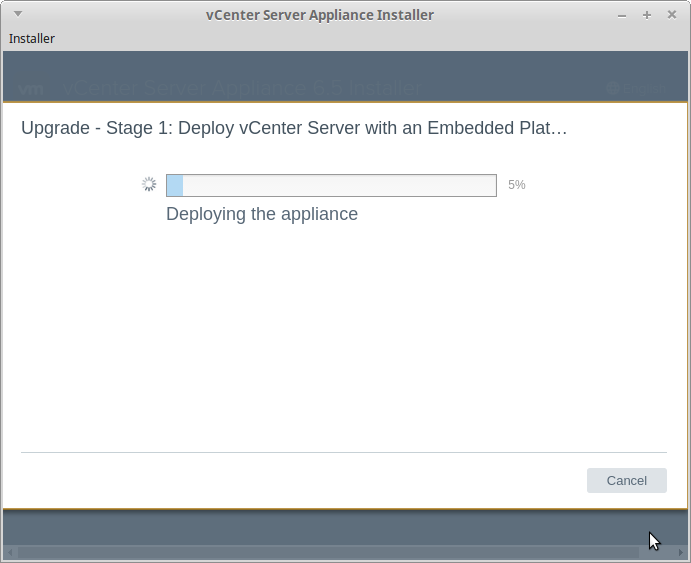
    1. The deployment of new VCSA will commence and you will see the following screen once its completed to continue with the stage 2.

vCenter Server Appliance Installer 
Installer 
Upgrade - Stage 1: Deploy vCenter Server with an Embedded Plat.. 
Deploying the appliance 
Cancel

vCenter Server Appliance Installer 
Installer 
Upgrade - Stage 1: Deploy vCenter Server with an Embedded Platfor... 
You have successfully deployed the vCenter 
Server with an Embedded Platform Services 
Controller. 
100% 
Deployment complete 
To proceed with stage 2 ot the deployment process, appliance setup, click 
Continue. 
If you exit, you can continue with the appliance setup at any time by 
logging in to the vCenter Server Appliance Management Interface 
https:,'\192.168.10.g:5480/ 
Continue 
Close


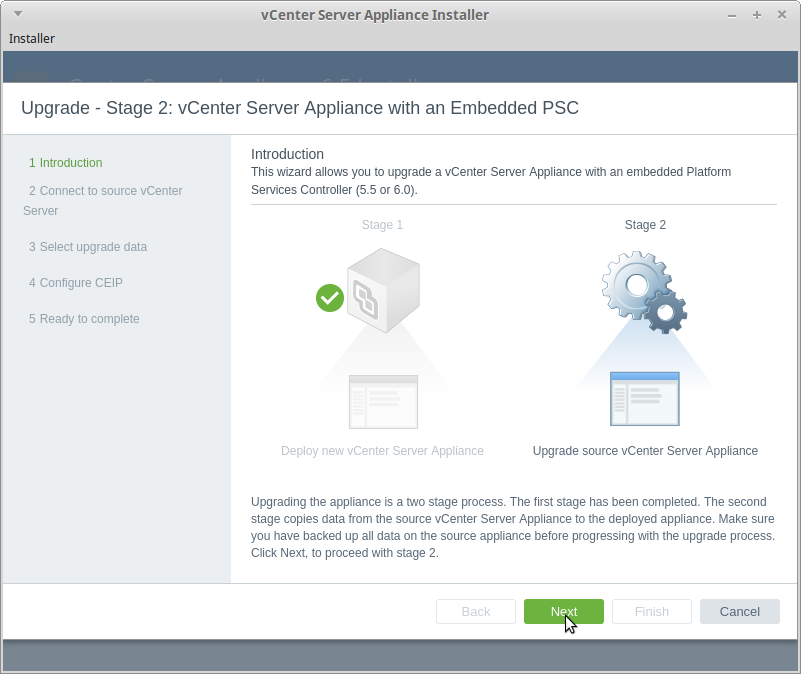
Stage 2 of deployment


    1. Click Next to continue with the upgrade
       
vCenter Server Appliance Installer 
Installer 
Upgrade - Stage 2: vCenter Server Appliance with an Embedded PSC 
1 Introduction 
2 Connect to source vCenter 
Server 
3 Select upgrade data 
4 configure cap 
5 Ready to complete 
Introduction 
This vizard allows you to upgrade a vCenter Server Appliance with an embedded Platform 
Services Controller (5.5 or 6.0). 
Deploy new 'Center Server Appliance 
Stage 2 
Upgrade source vCenter Server Appliance 
upgrading the appliance is a two stage process. The first stage has been completed. The second 
stage copies data trom the source vCenter Server Appliance to the deployed appliance. Make sure 
you have backed up all data on the source appliance before progressing with the upgrade process. 
Click Next, to proceed with stage 2 
sack 
Next 
Cancel

    1. You will see the warning regarding Pre-Upgrade check result and ensure the upgrade conditions are met.

vCenter Server Appliance Installer 
Installer 
Upgrade Stage vCenter Server Appliance with an Embedded 
Pre-upgrade check result 
Warning 
Resolution 
This ESXi host [bc-esx2.ad.burmesecloud.coml is managed by 
vcenter server [192.168.10.101. 
Make sure the cluster where this ESXi host resides is not set to Fully 
Automated DRS for the duration of the upgrade process. 
Close

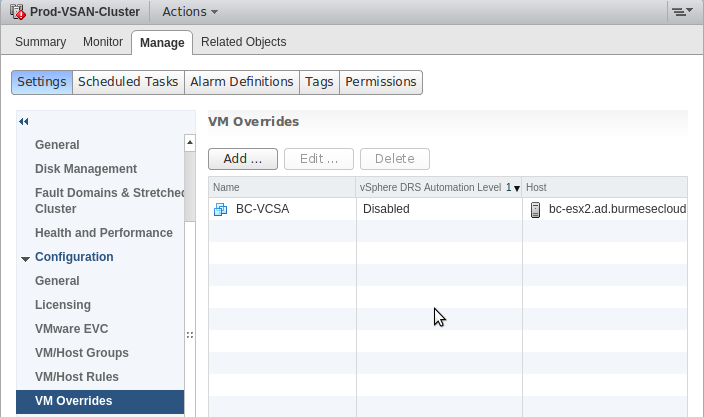
    1. Ensure DRS Automation is set to manual or DRS is off before proceeding. I set VCSA VM not to participate in DRS as I have it running on local storage of host 2.

Prod-VSAN-Cluster Actions 
Summary Monitor Manage Related Objects 
ngs Scheduled Tasks Alarm Definitions Tags 
VM Overrides 
General 
Disk Management 
Fault Domains & Stretc 
Cluster 
Health and Performance 
Configuration 
General 
Licensing 
VMware EVC 
VM/Host Groups 
VM/Host Rules 
VM Overrides 
ac-vcsA 
Permissions 
vSphere DRS Automation Level I 
Disabled 
Host 
bc-esx2.ad.burmesecloud


    1. Select the data you want to migrate to new VCSA. Since this my home lab I am copying only configuration data and not concerned about historical data.

vCenter Server Appliance Installer 
Installer 
Upgrade - Stage 2: vCenter Server Appliance with an Embedded PSC 
1 Introduction 
2 Connect to source vCenter 
Server 
3 Select upgrade data 
4 configure cap 
5 Ready to complete 
Select upgrade data 
Select the data that you wish to copy from the source vCenter Server. 
The data sizes shown below represent ony the data that will be copied to the target server. It does 
not correspond to the actual size of your data on the source server. The identity of the server will 
also be copied and the source server will remain unchanged. 
@ configuration (1.3 GB) 
O 
Configuration, events, and tasks (1.4 GB) 
O 
Configuration, events, tasks, and performance metrics (1.4 GB) 
Back 
Cancel

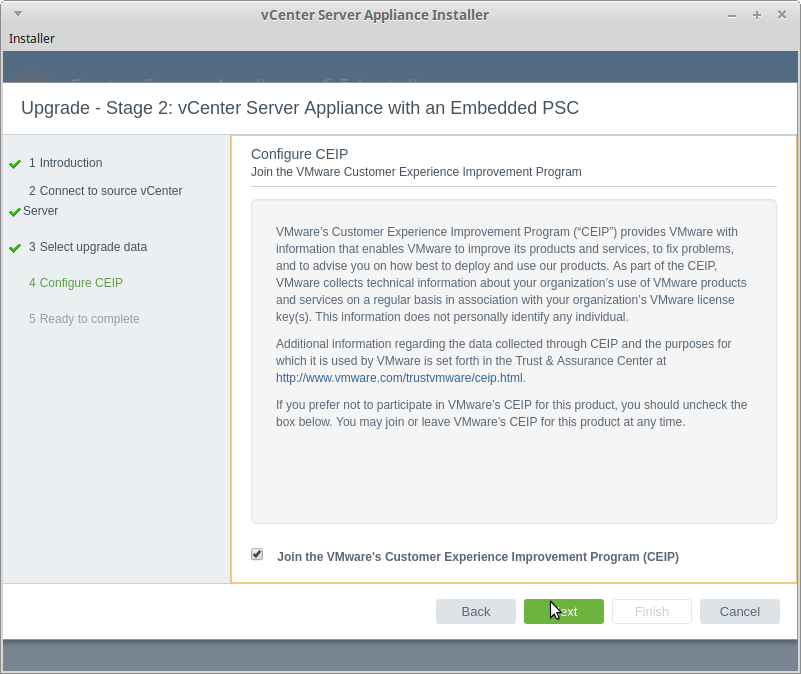
    1. Uncheck the checkbox if you do not wish to join VMware CEP to improve their product.

vCenter Server Appliance Installer 
Installer 
Upgrade - Stage 2: vCenter Server Appliance with an Embedded PSC 
1 Introduction 
2 Connect to source vCenter 
Server 
3 Select upgrade data 
4 configure CEP 
5 Ready to complete 
configure cap 
Join the VMware Customer Experience Improvement Program 
VMware's Customer Experience Improvement Program CCEIP") provides VMware with 
information that enables VMware to improve its products and services, to fix problems, 
and to advise you on how best to deploy and use our products. As part ofthe CEIP, 
VMware collects technical information about your organization's use ot VMware products 
and services on a regular basis in association with your organization's VMware license 
key(s). This information does not personally identify any individual. 
Additional information regarding the data collected through CEIP and the purposes for 
which it is used by VMware is set forth in the Trust & Assurance Center at 
http:/twwn.v.vmware.commustvmware/ceip html 
If you prefer not to participate in VMware's CEIP for this product. you should uncheck the 
box below. You may join or leave VMware's CEIP for this product at any time. 
Join the VMware's Customer Experience Improvement Program (CEIP) 
Back 
Cancel

    1. Review the summary and acknowledge that you have backup of the source vCenter server and database.

vCenter Server Appliance Installer 
Installer 
Upgrade - Stage 2: vCenter Server Appliance with an Embedded PSC 
1 Introduction 
2 Connect to source vCenter 
Server 
3 Select upgrade data 
4 configure CEP 
5 Ready to complete 
Ready to complete 
Review settings before completing the wizard. 
Source vCenter Server Appliance with embedded PSC 
FQDN or IP address 
Version 
bc-vcsa.ad.burmesecloud.com 
Target vCenter Server Appliance with embedded PSC 
FQDN or IP address (temporary) 
FQDN or IP address (post-upgrade) 
Version 
Upgrade Data 
Data to copy 
Customer Experience Improvement Program 
CEP setting 
192.168.10.g 
bc-vcsa.ad.burmesecloud.com 
6.5.0.5100 
Configuration only 
1.3 
Opted in 
•J I have backed up the source vCenter Server and all the required data trom the database. 
Back 
Finish 
Cancel

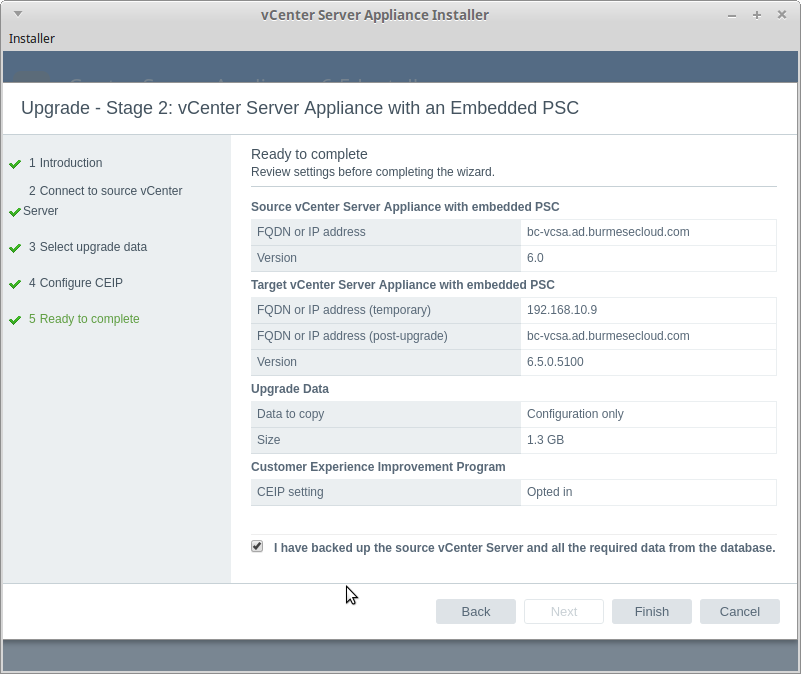
    1. As mention, the source vCenter will be shutdown once the network configurations are copied over to the new vCenter. It is good that Upgrade process does not delete the source VM and you can always bring it back online if the upgrade gone sideway.

    1. Click OK to continue with the migration.
Shutdown Warning 
The source vCenter will be shut down o ethe netuork configuration is 
enabled on destination vCenter Server. 
Click OK to continue, or Cancel to stop the upgrade. 
Cancel

    1. Now go get a coffee or do something while the migration is in progress.

vCenter Server Appliance Installer 
Installer 
Data transfer and appliance setup is in progress 
1. Copy data from source vCenter Server to target vCenter Server 
Exporting VMware vCenter Server Database data... 
2. Set up target vCenter Server and start services 
3. Import copied data to target vCenter Server 
Close


    1. If everything goes well you will see the following screen and upgrade is completed. Enjoy!!

vCenter Server Appliance Installer 
Installer 
Complete 
1. copy aala Trom source vcemer server to targel vcenær server 
2. Set up target vCenter Server and start services 
3. Import copied data to target vCenter Server 
100% 
Complete 
Data transfer and appliance setup has been completed successfully. Click on one of the links below, to manage the appliance. 
Press close to exit. 
vSphere Web Client 
h Wbc-vcsa.ad.burmesecloud.com:443/vs here-client/ 
Close

Check out the vSphere 6.5 release note if you would like to get more details on the product.

Sunday 20 November 2016

Nutanix CE nested on VMware ESXi 6.5 - VLAN Tagging


Controller VM 
VLAN: 10 
etho 
VMI 
VLAN: 101 
VM2 
VLAN: 102 
etho 
Acropolis 
Hypervisor 
VLAN: 10 
etho 
- --7--1-----J-----J--— — — 
tapO 
bro 
ondO 
v net 
bro 
tapl 
eth 
Physical Switch 1 
Switch Trunk Ports 
VLAN: 10, 101, 102 
eth 
Physical Switch 2
Figure 1 - Nutanix Open vSwitch


Configure VLAN tags on br0 on every AHV host in the cluster. Repeat this config on all hosts using vSphere Console by logging in as root. 
  
ovs-vsctl set port br0 tag=10 
ovs-vsctl list port br0 

Configure VLAN tags for the CVM on every CVM in the Nutanix cluster. Repeat on all hosts. SSH from host using nutanix account. 


ssh nutanix@192.168.5.2 
nutanix@CVM$ change_cvm_vlan 10 

Update DNS server setting on all nested hosts.

vi /etc/resolv.conf 

Install open-vm-tools package on nested host 

yum install –y open-vm-tools 

For better network performance and less dropped packets in nested environment, install esxi mac learning dvfilter as mentioned by William Lam - virtuallyGhetto. Check out his blog for more info on dvfilter.

esxcli software vib install -v http://download3.vmware.com/software/vmw-tools/esxi-mac-learning-dvfilter/vmware-esx-dvfilter-maclearn-1.0.vib -f 


Confirm the install. No reboot required. 

/sbin/summarize-dvfilter 

For the dvFilter to work, you will need to add two Advanced Virtual Machine Settings to each of your Nested AHV VMs. This setting is on a per vNIC basis, which means you will need to add N-entries if you have N-vNICs on your Nested AHV VM. 

ethernet0.filter4.name 
dvfilter-maclearn 
ethernet0.filter4.onFailure 
failOpen